
Wedding Season means Wedding Signs
- Jul 10, 2018
- 3 min read
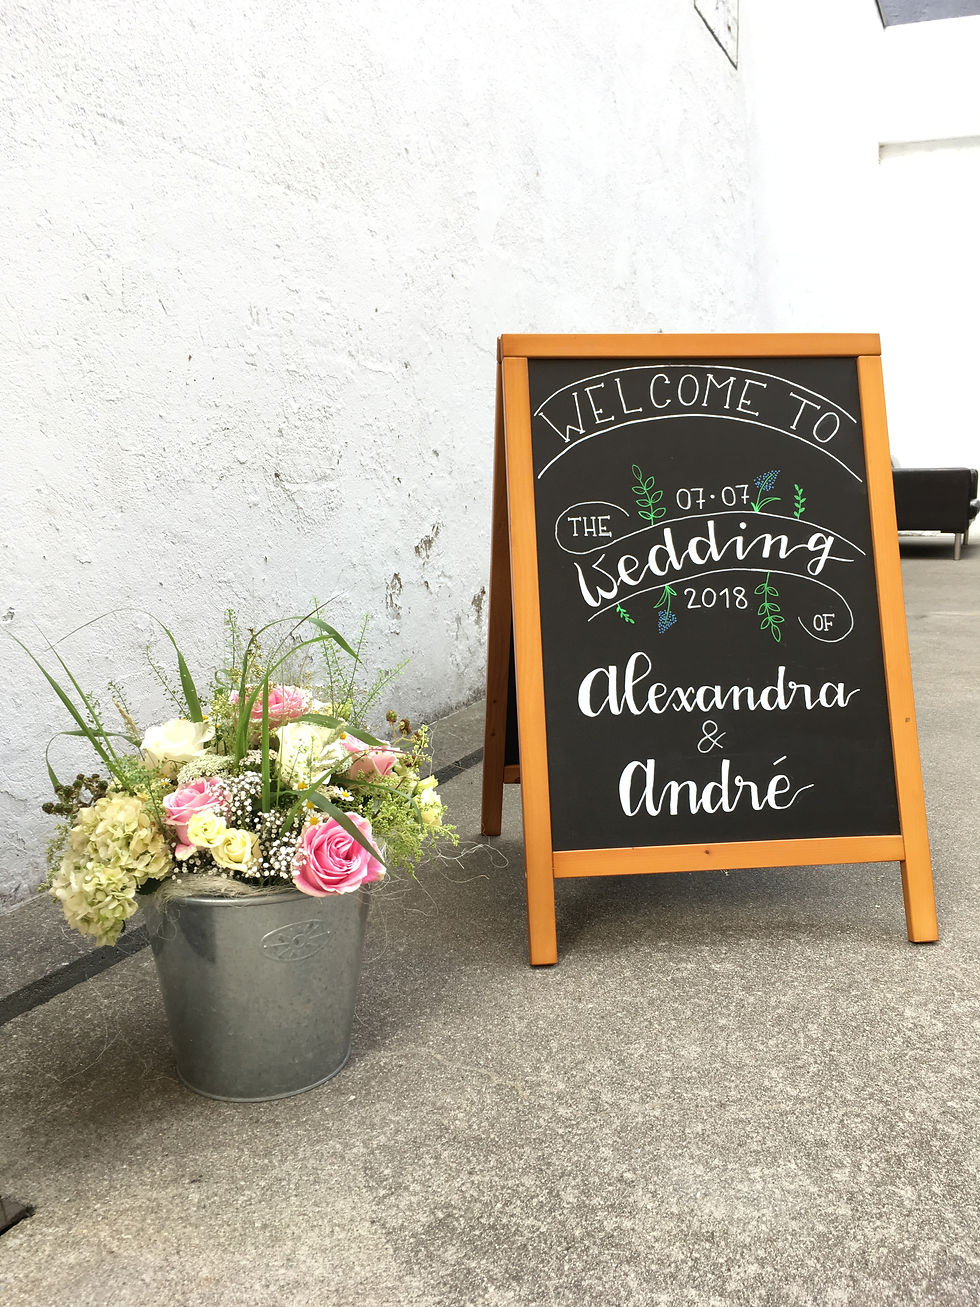
This weekend we were invited to celebrate Alexandra’s and André’s wedding. S. and André know each other for years and I was so excited because we could witness their relationship from the beginning.

I love weddings, especially going on weddings as a guest. I’m still not sure, when and how I would get married, I change my mind from big wedding to only family every few months. Because I love going on weddings, I was so excited that this time, I could do some beautiful wedding chalkboard signs for the groom and the bride.
Of course I was anxious, these signs most probably would end up on one or two of their pictures and what if they don’t like it? I mean, it’s their wedding!
After having a lot of trouble with the delivery of the chalkboard, being a little scared that they wouldn’t arrive on time for the wedding, I could finally start drawing everything out.
All you'll need:
1 Chalkboard Sign (in whatever dimension YOU like)
1 Chalk Stick (the normal chalk)
2 Chalk Markers (usually white is the colour you'll need the most of)
I’ve learned a lot along the way, especially, you’ll get chalk EVERYWHERE. And I mean EVERYWHERE! Imagine you’re lying in very fine sand. Even though you don’t roll around in the chalk, it somehow will end up all over your clothes and your skin. Make sure you don’t wear the darkest clothes.
I also learned that you’ll need a LOT of white chalk markers. If you’re doing a big sign and you probably redo some things, get at least two chalk marker per sign, there’s nothing more annoying than not being able to get the writing opaque because you’re running out of chalk ink.
The process of handling chalk markers was surprisingly easy. I thought it would be way harder but if you’re sketching everything out with your normal chalk, the chalk marker are perfect for lining and faux lettering. Don’t be scared, you can redo everything!
Oh and my last tip: Q-Tips will be your best friend!
All you have to do is measure out the chalkboard sign and then do a sketch on paper scaled-down. Browsing through your favourite social media platform for inspiration definitely helps. If you start on the chalkboard, do a grid in normal chalk before starting so everything is evenly spaced and then start with your chalkboard markers. Make sure your hand isn’t too shaky and write in a slow but even motion. Don’t worry going over a second time before you’re happy with your design. If you’re happy, let the marker chalk dry, take a dry paper towel and erase the chalk grid. Don’t be too harsh with that towel, rather go over a spot three times in a light motion than go over it too hard and erase the marker too. There will get some colour off the chalk marker so you’d have to go over it a second time anyways.
Don't worry if you're not perfect the first time, you'll do it over and over until you're happy with it but that's just part of the process.

Being at the wedding I was so relived because everyone seemed to love the signs and they really gave this special touch to the reception.
I’m so so happy for Alexandra & André! Thank you for having us!

(some links are affiliated. You absolutely don't have to use them if you'd rather not.)


Comments